Read Part 1.
Part 2
On the Desktop Computer
Setting up the FTP server was straightforward. After installing the programme, select the User Manager and click 'New' to add a new user.

You'll need to:
- Set the password. If the computer is behind a firewall and can't be reached from outside, it'll be safe to set it to blank.
- Add a 'root' directory. This will be the directory where the files to be synchronised are. The name used on the FTP server doesn't have to relate to the actual name on the computer.
- Don't forget to give the remote user access to the directory by clicking on it and selecting read/write/create permissions.
On the Laptop
Setting up the SyncBack software was slightly more complicated, due to the extra options available. From the Profiles menu, select 'New' and choose 'Synchronisation'.

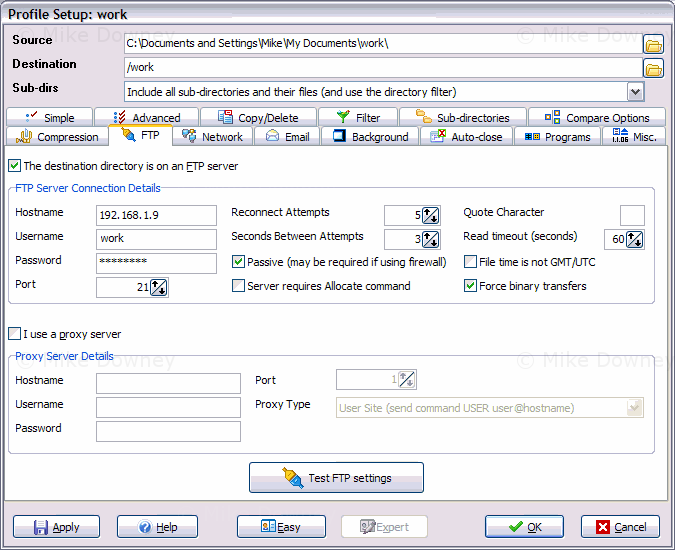
Give the profile a sensible name, then click 'OK'. The profile settings box should appear. Click on Expert to open up more options.

The 'Source' directory is the directory on the computer which is to be synchronised with the server. The 'Destination' is the directory name we chose on the FTP server. Most of the other settings can be left as they are, apart from the FTP tab.
After typing in all the details, it would be sensible to do a few tests first. Clicking on Test FTP Settings will check whether the serve is reachable. After making all the changes and clicking OK, SyncBack will do a 'test' run to see what files will be transferred.
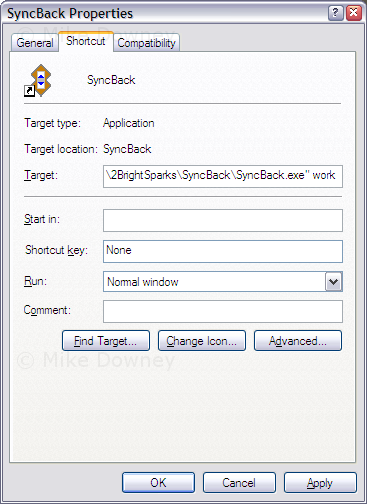
Once everything is set up, it's only a few mouse clicks to synchronise the data between the two computers. This could be speeded up by telling SyncBack to always run the profile every time you double click on the icon. To do this, right-click on the desktop shortcut and select 'Preferences'. Add the name of the profile after the application name (in this case, work). When the icon is double-clicked, SyncBack will run the profile and then exit.

The only potential problem I can foresee is that a file deleted from one computer but not both will re-appear after synchronising.
